How to Display Password in a Form Input
On most websites, when filling in the password in a form either to sign up or to log in, you will often see a button (or a checkbox) telling you to show password. This is often good for user experience so that the user, if unsure can check to see if they made an error.
In this tutorial, we will create a similar project where we can type in our password in a form and check a checkbox to display or hide it. Let’s get started.
Requirements:
Before we get started, we need to have a few things in place first. Some of the requirements are as follows:
- HTML
- CSS
- Basic Knowledge of JavaScript (ES6)
- DOM
Basic understanding of the skills above is enough for you to be able to follow along and understand the code in the tutorial.
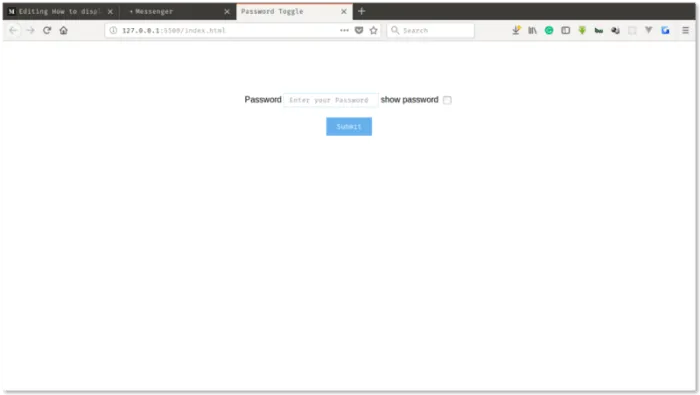
For context, this is a sample of what we will be building At the end of this tutorial we will have something like this:
The final code snippet will be provided in a Codepen link at the end of the article.
Setting up our Environment
-
Open up your code editor. I’m using Visual Studio Code. You can use whatever you are most comfortable with.
-
Inside the editor, create a directory called password-toggle (use whatever name you want to, this is just for descriptive purposes)
-
Inside the password-toggle directory:
-
Create an
index.htmlfile -
Create a
style.cssfile -
create a
main.jsfile
Your file structure should like this:
password-toggle/
│
├── index.html
│
├── style.css
│
├── main.js
│
Let’s get into development
In our index.html, add the default boilerplate and name our title “How to display or hide password”. Also, let’s link our CSS and JavaScript file to our HTML so we can be able to use both.
<!DOCTYPE html>
<html lang="en">
  <head>
    <meta charset="UTF-8" />
    <meta name="viewport" content="width=device-width, initial-scale=1.0" />
    <meta http-equiv="X-UA-Compatible" content="ie=edge" />
    <!-- CSS stylesheet -->
    <link rel="stylesheet" href="style.css" />
    <title>How to display or hide password</title>
  </head>
  <body>
    <!-- JavaScript file -->
    <script src="main.js"></script>
  </body>
</html>
Pro Tip💡: If you are using Visual Studio Code, when you type ! and press tab or enter on your keyboard, it will auto-complete the rest of the boilerplate for you.
If you are using other editors like Sublime Text or Atom, you will need to install the Emmet extension for this to work.
Let’s create our form input so we can have a field to type in our password.
<!DOCTYPE html>
<html lang="en">
  <head>
    <meta charset="UTF-8" />
    <meta name="viewport" content="width=device-width, initial-scale=1.0" />
    <meta http-equiv="X-UA-Compatible" content="ie=edge" />
    <title>Password Toggle</title>
    <link rel="stylesheet" href="style.css" />
  </head>
  <body>
    <form>
      <label for="password">Password</label>
      <input type="password" id="password" placeholder="Enter your Password" />
      <label for="togglePassword">show password</label>
      <input type="checkbox" id="togglePassword" />
      <button type="button">Submit</button>
    </form>
    <script src="main.js"></script>
  </body>
</html>
In our style.css file, add the following styles. This is just to make it look presentable. Feel free to style this however way you want to.
body {
  font-family: 'Arial', 'Helvetica', sans-serif;
  text-align: center;
  margin-top: 100px;
}

input[type='password'],
input[type='text'] {
  border: 1px #b6e7f9 solid;
  padding: 5px 10px;
}

input[type='checkbox'] {
  vertical-align: middle;
}

button {
  padding: 10px 20px;
  margin-top: 20px;
  color: #fff;
  background-color: #65b0ed;
  border: none;
  display: inline-block;
  cursor: pointer;
}
Ensure that your code is saved and when you open up your browser, your page should be looking like this:
Let’s move over to the app.js file and begin to write our JavaScript code.
Our pseudo-code logic should be like this:
- When the user clicks the show password checkbox, the input type should change to a text. This will enable the password to display as plain text.
We will be using ES6 arrow function to write our function.
First thing, let’s assign the checkbox element tag and save it to a variable:
const togglePassword = document.getElementById('togglePassword');The document.getElementById() returns a HTML element whose id property matches the specified string. Since element IDs are required to be unique if specified, they’re a useful way to get access to a specific element quickly.
After assigning the checkbox element to a variable, let’s write our function that will contain the code to make our app work.
const showOrHidePassword = () => {
  const password = document.getElementById('password');
  if (password.type === 'password') {
    password.type = 'text';
  } else {
    password.type = 'password';
  }
};-
Line 1: Our function is given a name called showOrHidePassword using the camel case notation.
-
Line 2: We assigned the input field having an id of password, which is the password field to a variable called password.
-
Line 3: We did an if-statement to check if the type of input is a text using the password.type (recall that password is a variable assigned to the input field in the HTML).
-
Line 4: If the if-statement returns true (the type of input is a password), then we want to change it to a text instead.
-
Line 6: If it returns false (the input type is a text), then we want to change it to a password.
Our code is almost complete, the only thing left would be to add an event listener to listen to an event (in this case, a change event), so that when we check the checkbox, the function would execute.
togglePassword.addEventListener('change', showOrHidePassword);You can find the complete code on this repo. Also, the Codepen below contains the complete code:
See the Pen How to toggle your password by Emmanuel Raymond (@peoray) on CodePen.
If this was helpful, interesting, or caused some other positive emotion, please share!